Wednesday, July 8, 2020

Wild Yeast Ideas

A few months ago, a friend of mine posted about trying to capture some "wild" (actually local, not necessarily wild) yeast to use in his bread making endeavors. I pointed him towards The Mad Fermentationist, hoping I might help him be successful. Of course, revisiting Michael Tonsmeire's work sent me down the rabbit hole... Where I discovered Sui Generis Brewing and http://suigenerisbrewing.com, which I also shared with my friend.

For years, I have dreamed of cultivating yeast from my own yard in order to brew beer. Between hearing about relatively low success rates and the amount of time I actually have been spending on brewing the last few years, the idea has gotten shelved almost as soon as my mind has wandered to the topic.

Although I had not yet recommitted myself to brewing, watching Bryan's videos at Sui Generis got me thinking about local yeast again... My new "small batch" mindset seems perfect for a little bit of yeast experimentation!

Several types of berries are currently ripening around my yard, and I have always considered these when thinking of trying to collect local yeast:
  • salmon berry (Rubus spectabilis - usually the first to ripen each year; very tart, even when ripe; rare to find fully ripened [red] berries - they are a favorite of the robins!)
  • thimbleberry (Rubus parviflorus - usually ripen following the salmon berry; red raspberry-like fruit; sweeter than salmon berry, but not super sweet)
  • trailing blackberry (Rubus ursinus - usually ripens in August, but is ripening early this year; the only blackberry truly native to my area; sweet and highly sought after, especially by wild berry snobs)
  • red huckleberry (Vaccinium parvifolium - usually ripens mid-summer; tart)
In late summer and early fall, I will also have access to:
  • Himalayan blackberry (Rubus armeniacus - ripens late summer; large, juicy berries - extremely sweet; considered a noxious weed, and ill-favored by wild berry snobs)
  • evergreen blackberry (Rubus laciniatus - ripens late summer; often intermingled with Himalayan blackberry; larger, seedy berries - tart; considered a noxious weed and not picked by anybody)
  • evergreen huckleberry (Vaccinium ovatum - ripens late summer/early fall; small black berries - sweet)
  • salal (Gaultheria shallon - ripens in late summer/early fall; mealy berries - not much flavor; I have seen robins get "drunk" from eating extremely ripe salal berries in the fall!)
  • Oregon grape (Mahonia nervosa - ripens late summer/early fall; small, purple berries - tart)
Tonight, I decided to get the ball rolling. I boiled up a batch of weak starter (1.020 w/ ~8 BU; 100g DME/200ml water). My father-in-law gave me his old 22-quart pressure cooker (in all its yellow enamel splendor, complete with the 1980 sales receipt!), so I made plenty of starter wort and canned it in pint mason jars.

Sunday, July 5, 2020

Jumping Back In!

Someone in the local homebrew club posted the deadline for the Western Washington State Fair's homebrew competition this past week. It's July, so like I posted the other day, it's kind of like my brewing new year... My wife knew that I was getting ready to brew, so she encouraged me to brew some beers for the competition.

Motivated by my new plan - to brew smaller batches - I dug out my brew log. As I thumbed through it, I jotted down a few notes. I figured if I was going to brew for the competition, I should start with some styles that had yielded past success. If lagers were going to be in the mix, I would have to get those cranked out first - so that is where I started. 

I decided on a Vienna lager and a German pils. The former was pretty easy, because that recipe has been pretty stable for me for a while now. However, when I was looking for a solid German pils recipe, I was only able to narrow it down to two - I could not figure out which one was the one I had liked better; I decided to try both... So I scaled those down, along with a dark mild recipe.

Armed with four prettty solid starting beers, I headed to my LHBS to purchase all of the ingredients...

Saturday, July 4, 2020

Brew Year's Resolution - in July (There's a Pattern)

Some people do New Year's Resolutions. Apparently, I do summer resolutions!

Here it is July again, and I find myself gravitating back to homebrewing. Again. I only brewed 5 beers in 2019, and 4 of them were brewed in the summer. I would like to say that this will change for the remainder of 2020 (which has obviously been a doozie!) and into 2021, but I say that every year...

I like planning - developing recipes. I like brewing. I certainly like drinking the results. But like so many other brewers, I hate cleaning! The setup and time for an all-grain brew day is a bit of a drag as well. I suppose that there are ways to make setup more efficient, which might shave some time off of that step. An extract or extract with steeping grains batch can reduce the brew day a great deal. There are no real shortcuts for cleaning, however.

This summer, I find myself analyzing brewing a bit differently. Along with the simplified analysis of what I like and don't like about brewing in general, I decided to think about what I like about drinking  beer. Above all else, I love the refreshing variety of flavor and style options. My wife is always asking me why I need so much beer; the answer is choice. I like to have choices!

Some days I want something light and refreshing - a craft lager or pilsner hits the spot (and because of hockey, I also always have some locker room beer like Rainier or PBR). Other days, I crave something hoppy - an IPA, pale, or session pale are there for me on those days. When I long for something dark and roasty - a porter or stout fits the bill. Besides simply matching the hankering in the moment, I also like to match the beer to the food I make.

Brewing that much variety in 5-gallon (or larger) batches is an undertaking. I do have a 4-tap keezer, but brewing and keeping 20 gallons of beer is kind of a big deal. When I used to brew with friends, it was easier; one year, a friend and I brewed over 300 gallons! Nowadays, however, it seems like I barely brew 20 gallons a year! Clearly, a different approach is in order...

In years past, I have mashed and brewed a bigger batch - to the tune of 10-12 gallons - and split it into two smaller batches. That worked well enough: more beer for not much more time on a brew day (running two burners for the boils). I have tried parti gyle batches, were I got a bigger beer and a smaller beer; I have made different beers from the same wort by varying hop charges and yeasts; and I have brewed very different styles from the same base wort by utilizing steeping grains. Each of these double batches got me two kegs. I'm not sure that any of these methods will get me brewing more often though.

Even if I were to go the double batch route, and fill all four of my taps, that might be 2 or 3 brew days, which is reasonable. Although four choices is technically quite a bit of variety - I could easily cover my bases with a lager, something hoppy, something darker, etc. - that's 5 gallons each; roughly 36 pints each keg. The novelty of those specific varieties often wears off before the keg is blown.

When I first begain brewing, doing extract batches on the stovetop, I often brewed smaller batches. Not only was it easier to manage, I also got to try my hand a lot of different styles! Back then, bottling 2-3 gallons of beer into some combination of about 24 bottles, 12 ounce and 22 ounce, was a lot less daunting task than bottling a full 5-gallon batch as well. After watching James Spencer brew up a one gallon batch on Basic Brewing Video, I even did a bunch of those batches, which yielded about a six pack of finished beer (that was a lot of work for six beers - I would recommend doing a 2-3 gallon batch over this method, unless you were conducting experiments).

These days, I have four 2.5-gallon kegs, which I have used for the occasional 1/2 batch (or when I brew something like a mild for a yeast starter). When I eyed those smaller kegs the other day, it got the gears turning... The smaller volume might get me over the "I'm kind of tired of this" hurdle. The smaller size also means that I can potentially fit more into my keezer - if I stack them; if I add some new taps, I could potentially double my choices (withiout having to drink 5 gallons of the same beer!)!

The prices have come down quite a bit on the smaller kegs (at least since I first bought mine about 5 years ago). I'm thinking it is probably worth investing in few more 2.5-gallon kegs. I already have quite a few 3-gallon carboys - more than enough to get a handful of beers going. Scaling recipes is a snap.

All of this has me a little bit excited - more excited than I have been about brewing for a while! My plan for reinvigorating my brewing is to go small! It is undoubtedly too early, given that I have not even begun brewing aything yet, but I am dubbing this the "brew-a-week" plan...

Sunday, March 12, 2017

Brewing Anniversary #10

When the holidays rolled around, I started thinking about brewing again. I only brewed 5 batches of beer last year, which is at least half as much as I would have liked... In fact, if it had not been for an event that I wanted to brew beer for, and a free grain bill provided by a friend, I probably would not have even brewed at all - and that is even more depressing!

As my thoughts turned back to brewing, I dug into books about beer, thought more deeply about each beer I was drinking (that's a lot of deep thinking!), and got caught up on brewing podcasts. As I listened, a couple marked anniversary episodes - most notably Experimental Brewing (1 year) and Dr. Homebrew (3 years). In the latter, the hosts always ask the guests how long they've been brewing... Which got me to thinking.

Growing up in the Pacific Northwest, I was aware of craft (micro) brews early on. My first was a Redhook Ale (not ESB, but their original ale) in the mid-80s in high school. It was certainly interesting, but kind of a palate shock for a teenager whose primary experience had been drinking Rainier and Heidelberg! During my first 4 years in the Army, I still drank mostly American lagers, but was exposed to lots of other good beer by fellow Soldiers who had been stationed in or traveled to Europe.

With this, my palate began to shift, and I came home to the Puget Sound to a proliferation of craft beer and grunge. My preferences included the aforementioned Redhook Ale, Pike Pale & IPA, and many other more flavorful and often hoppy beers. I made friends with the local beer distributor (who latrer went on to become one of the founding three partners at Elysian) at the Olympia Top Foods while in college, and he taught me a lot about beer as he tipped me off to new labels and offerings 22 ounces at a time.

In about 1992, I drank my first homebrew, brewed by a lifelong friend. The details have long faded from memory, but I do remember a reddish, hoppy pale ale. It probably was not super, but he had made it himself. At home. It was not super dry - there was considerable crystal malt character, and the hop character leaned on the bittering addition; all of this was very characteristic of styles in the late 80s and early 90s, much different than the dry, late-hopped pales we have today. In the late 90s and early 00s, I actually watched a couple of friends brew while I drank beer and did very little other than ask questions and stir pots.

The fruits of one of those brew sessions, a Fuller's pale clone, was enjoyed streamside after work one day in the spring of 2004, right before the birth of my second son... It was a little undercarbonated (the swing-top probably needed a new gasket), but it was delicious: bready malt flavor almost hidden by fresh hop character. After several years of thinking about it, I decided to take the leap. I asked for a homebrewing kit for my birthday in August.

We never got around to buying the kit that summer. I guess I underestimated how much work juggling work, a two-year-old, and a newborn was going to be. In fact, we still had not gotten around to it on my following birthday. And then my unit got called up to go to Afghanistan.

While deployed, the closest I got to beer was Bitburger Drive, their NA beer. While younger troops dreamed about cars and girls, I was dreaming about food and beer. I found out that one of the senior NCOs I had working for me was an experienced homebrewer (in fact, he confessed that he had run out of time before we shipped out, and he had a carboy of brown ale sitting in his bathtub during our entire deployment!). I grilled him for info every chance I got. At one point, I accompanied his team on a 6-week op (in the Korengal Valley - but that is s different story)... We talked a lot about beer and brewing. We were embedded with a CAV troop, and saw a lot of action during that month and a half, but our beer discussions kept us sane.

During one of those discussions, he recommended Charlie Papazian's seminal book, The Complete Joy of Homebrewing. He told me all I needed to get started was a kit and that book... I ordered it (along with The Homebrewer's Companion) the minute I got back to Bagram. I think I read those two books 2-3 times each during my last 3 months in-country! I already had several recipes picked out and the books looked well-worn before I had ever even brewed my first batch!

We spent Christmas (and New Year's) in Afghanistan, but my wife really wanted to celebrate the holidays when I returned. I put the brewing kit at the top of my gift list! And this time I got it...

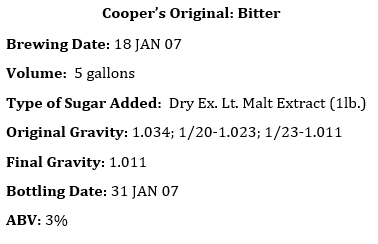
Cooper's
I was ecstatic when I unpacked my new homebrewing kit... A bucket with a lid, a carboy, a racking cane, some tubing, etc. along with an extract kit (Cooper's Original Series Bitter, which looks to have been replaced by "Real Ale") augmented with steeping grains, dry malt extract, and hops. I could not wait to get going! I think I brewed the very first weekend I was home...

I started like so many others, at that time at least, with a stove-top partial boil. I used a ceramic-coated steel canning pot. I steeped my grains until the water hit 165, then removed them and let them drain in a colander. I added my 3 lb. can of Cooper's liquid extract and 1 lb. of light dry extract and brought them to a boil. I followed the directions and added my hops when the homebrew shop owner's recipe said to do so. I put 2 gallons of filtered, cold water in the carboy and poured the hot wort through a colander and funnel into the bucket, then topped off with more filtered water. I added the Cooper's dry yeast sachet, and plopped the lid and airlock on the bucket.

I followed the instructions mechanically. I knew the basic process from reading The Complete Joy of Homebrewing (3x - remember?), but I had minimal understanding... Similar to when you begin cooking for the first time, it's more about the algorithm of the recipe than the process and how the ingredients fit together to make the final product. Plus, like any other process-oriented task, it takes going through it a time or two before the timing and flow feel right. Despite what Charlie Papazian says, I found it hard to "relax" avoid worrying, and I had no homebrew yet! (I don't even remember if I drank beer while brewing this one.)

I did take good brewing notes (the can of Cooper's extract came with a short data sheet in the instruction packet). After two days, I measured the gravity; two days later, it was stable, so I "racked to secondary for conditioning." Like most people 10 years ago, I conditioned my beer in secondary - in my case a glass carboy. After two weeks, I ended up with 5 gallons of (under-attenuated) bronze-colored ale, which I bottle conditioned in a combination of new 22 oz. and recycled 12 oz. bottles. I was so close, and yer I still had two weeks to wait!

By the time the bottles from my first brew were carbonated and ready, I already had two more batches under my belt. I chilled a few bottles in the refrigerator, but one bomber went into the freezer for the quick chill... When it came out of the freezer, the cap came off with a satisfying "pop-hiss." It poured beautiful and clear, almost amber, with a beautiful head and wonderful hop aroma. Casting back, it also smelled characteristically like a liquid extract beer... This was not, I have since learned, necessarily because it was an extract batch, but more a product of it being a partial boil extract batch.

My first beer, albeit less-than-perfect (under-attenuated, extract-y, etc.), was a success! My mother-in-law, who is not really a beer drinker, even liked it. I was excited at my success, and even more excited that I already had two more batches nearing completion. I became obsessed with homebrewing, reading all that I could find, messing around with recipe calculators and watching the effects of different ingredients and amounts on virtual beers, and brewing at least once each month. I gained a reputation with my friends... The guy that finally got me started homebrewing became a regular brewing partner (one year, we brewed over 300 gallons together), and he started coming to me for brewing advice!

Ten years have gone by quickly. My boys, who were first inhibitors to brewing, progressed on as helpers; they loved hanging around on brew day and helping me bottle (which was great, because I loathed bottling). Now they're old enough that they have a fairly thorough understanding of the science of brewing, and they like hanging out occasionally on brew day less out of admiration and youthful desire to be part of what Daddy is doing and more just to hang out for the company. It won't be long before we can brew together while sharing a couple of homebrews. I'm not brewing as much as I have at times in the past, but I'm no less passionate about homebrewing.

Cheers!

Saturday, July 16, 2016

Three June Brews!

I mentioned in my last post that I finally got back on the brewing horse at least a 9-month hiatus... June was a big return - three beers worth!

The German Pils - actually much clearer than
it looks in this photo (I could not get the
condensation off the glass - the beer was very cold)
I have a long-standing tradition of brewing a beer for my outgoing commander as they change command. Funny, they usually have tricky tastes! Not necessarily hard, but labor intensive. Why couldn't they just like a straightforward style like a pale or stout? Most often, they want a lager beer - a Munich Helles, Czech Pilsner, or German Pils.

This time was no exception... He wanted a German Pils. I brew a decent one, but it's not something that can just be thrown together or rushed. Of course, in usual form, I waited until the last possible moment. I came in under the deadline, and the beer turned out great, but I cut it too close. It really could have used another week or two of lagering.

I wanted another beer to serve at the Change of Command and Unit Family Day picnic. I hadn't originally planned on a second beer however. I needed something that I could turn around quickly, and I wanted something to juxtapose against the Pils. Porter? Maybe, but I like Robust Porter - not exactly a crowd favorite during July. A Stout? Maybe, but it would probably be a tough sell to a non-beerophile crowd; people usually, valid or not, have the impression that Stouts are 'heavy.' Again, not usually what people look for in July. A Bitter - Ordinary or Best - might work, but that would be another light-colored beer, and additionally somebody else was bringing a (commercial) IPA.

The Dark Mild
I decided on a Mild. A Dark Mild. Not an ordinary choice. But I knew it would be a conversation piece! I love a Mild, and I like getting other people to try one (and possibly like it as much as I do!). Quick, low alcohol, flavorful - and low carbonation. That last piece, the low carbonation level, makes Mild a great choice for one of the quickest beers to turn around; it finishes out quickly, and you don't have to wait to get up to 2-2.5 volumes of CO2!

After tasting the final product, I opted to drift slightly out of style... It wasn't that this Mild didn't turn out well - it was delicious! The group of people who would be drinking it ranged from fizzy yellow beer drinkers (for whom the Pils would be a flavorful choice!) to craft beer drinkers; but most of the craft beer drinkers were used to more commonly available styles - primarily American Ales. So in the interest of adding a familiar element (at the risk of style points or sell-out accusations), I gave it a little dry hop... I dropped a 1/4 oz. of Goldings (in a 3 gallon batch) into the keg for about 36 hours. They added just enough hop aroma and flavor to the smooth, malty goodness. Purists be damned.

The Best Bitter
And I also ended up brewing that Bitter, but it was not ready in time for the picnic and I had already decided against bringing another 'pale' beer anyway. But it is always good to have a Best Bitter on tap!

Guess what? At the start of July, I brewed again! A Classic American Pilsner. It's fermenting right now. That makes 4 beers in about 6 or 7 weeks. That makes me happy.

German Pils Recipe

Dark Mild Recipe

Best Bitter Recipe

Homebrewing Relaunch

Fits and starts... That is a great description for all things brewing in my life! Whether it's this blog, my YouTube posts for Homebrew Wednesday, or brewing itself, maintaining momentum has been a problem.

This past year marked many changes for me. I found myself with a couple of new side jobs as well as new and increased volunteer roles in several non-profit boards and organizations. My kids are getting older and more involved in activities, and since they're not quite old enough to drive yet, that means I get to do my share of shuttling them around. They both started ice hockey this year - 7+ months of fun! Since they were playing, and I felt like I was living at the rink anyway, I decided to jump back in as well (it had been over 10 years since I had skated or played).

And then I separated my shoulder in a game last November. If I wasn't brewing because of how busy I was, the shoulder injury was the final nail in the coffin... I could not lift anything or put any strain on my shoulder, so brewing was out. Fortunately, lifting 12 ounces to 1 liter was still a possibility!

As we moved into late spring, I started getting the brewing bug again. I began lurking on forums: the AHA Forum, HomeBrewTalk, Northern Brewer, More Beer, the Brewing Network... I got caught up on brewing-related podcasts - old stand-bys and new ones as well: the Brewing Network (the Session, Dr. Homebrew, the Jamil Show, the Sour Hour), Basic Brewing Radio, and Experimental Brewing (my new discovery!). And then I dusted off the equipment and I brewed.

After over nine months of brewing sloth, I brewed three beers in the month of June! My brewing passion rekindled, I brewed a German Pils for my outgoing commander, a Best Bitter, and a Dark Mild. The Brew Garage is still a huge organizational mess (that might be part of what demotivated me in the first place last year), but I am chipping away at that in between other projects.

Beer had been in my sights all along, but with the homebrewing beast reawakened, a good portion of my thoughts have turned to brewing! What recipes do I want to brew next? Do I want to try anything new? Which old stand-bys do I absolutely want to have on tap right now? What new projects might I work on? Notice that I have not mentioned cleaning or organizing... It has to get done, but it is certainly not what I fantasize over!

I have been considering upgrading my portable dispensing system for years. I moved to kegging about 7 years ago - 3 years into the hobby. I had the space for extra refrigerators/freezers, so kegging made a lot of sense (and is a lot less work than bottling!). Once I was kegging, I added a paintball CO2 regulator and a few 20 oz. paintball canisters - Voila! Portable draft beer! I used either an old cooler with the lid removed (2 kegs) or an empty 15 gallon liquid malt extract drum (1 keg) to keep the kegs on ice, pushing the beer with CO2 from the paintball rig, and serving with picnic taps (aka "cobra" taps).

This is a fine setup. It is simple and serviceable. It is really about the beer right? I guess. But to me, it has always been kind of like most teenagers' first car... Most teens dream of something fancy or sporty, but end up saddled with economical. A car is a car, and having wheels opens up a whole new world. The same has been true for my homebrew portable dispensing setup. However, just like how I dreamed of upgrading my 1962 Mercury to a muscle car (which I eventually achieved, by the way), I've been fantasizing about a slicker beer serving setup for occasions when I take my beer on the road.

The assembled jockey box
The Along with the other brewing-related activities I had relaunched, I was also trolling Craigslist. I was planning a jockey box build, and weighing the pros and cons of stainless coils vs. aluminum plates, when a complete jockey box popped up on CL for about the price I was looking to pay for a cold plate by itself... I could not resist! I stopped the debate waging in my mind, and purchased the jockey box from an older gentleman who has given up brewing.

It came complete with everything I needed to serve from two Sankey kegs (the keg fitting used by most commercial brewers), short the CO2 tank. This is fine, because as I've mentioned, I already have a great portable CO2 system; I can repurpose the full size regulator or keep it set up from Sankey kegs. The gentleman described his cleaning and storage techniques - which seemed adequate - but I gave it a thorough cleaning and sanitizing anyway. He had it set up (probably the tavern owners from whom he bought it actually) with black beet lines. Black lines look super sleek, but I really do prefer clear... I like to see the beer flowing through the lines (Is it foaming excessively in the lines? Is the color what I expect? etc.), and I like to have the visual confidence that they are actually clean (I can easily see if there is beer stone or any other discoloration in the lines). So I ended up replacing all the beer lines. Other than that, it was ready to roll!

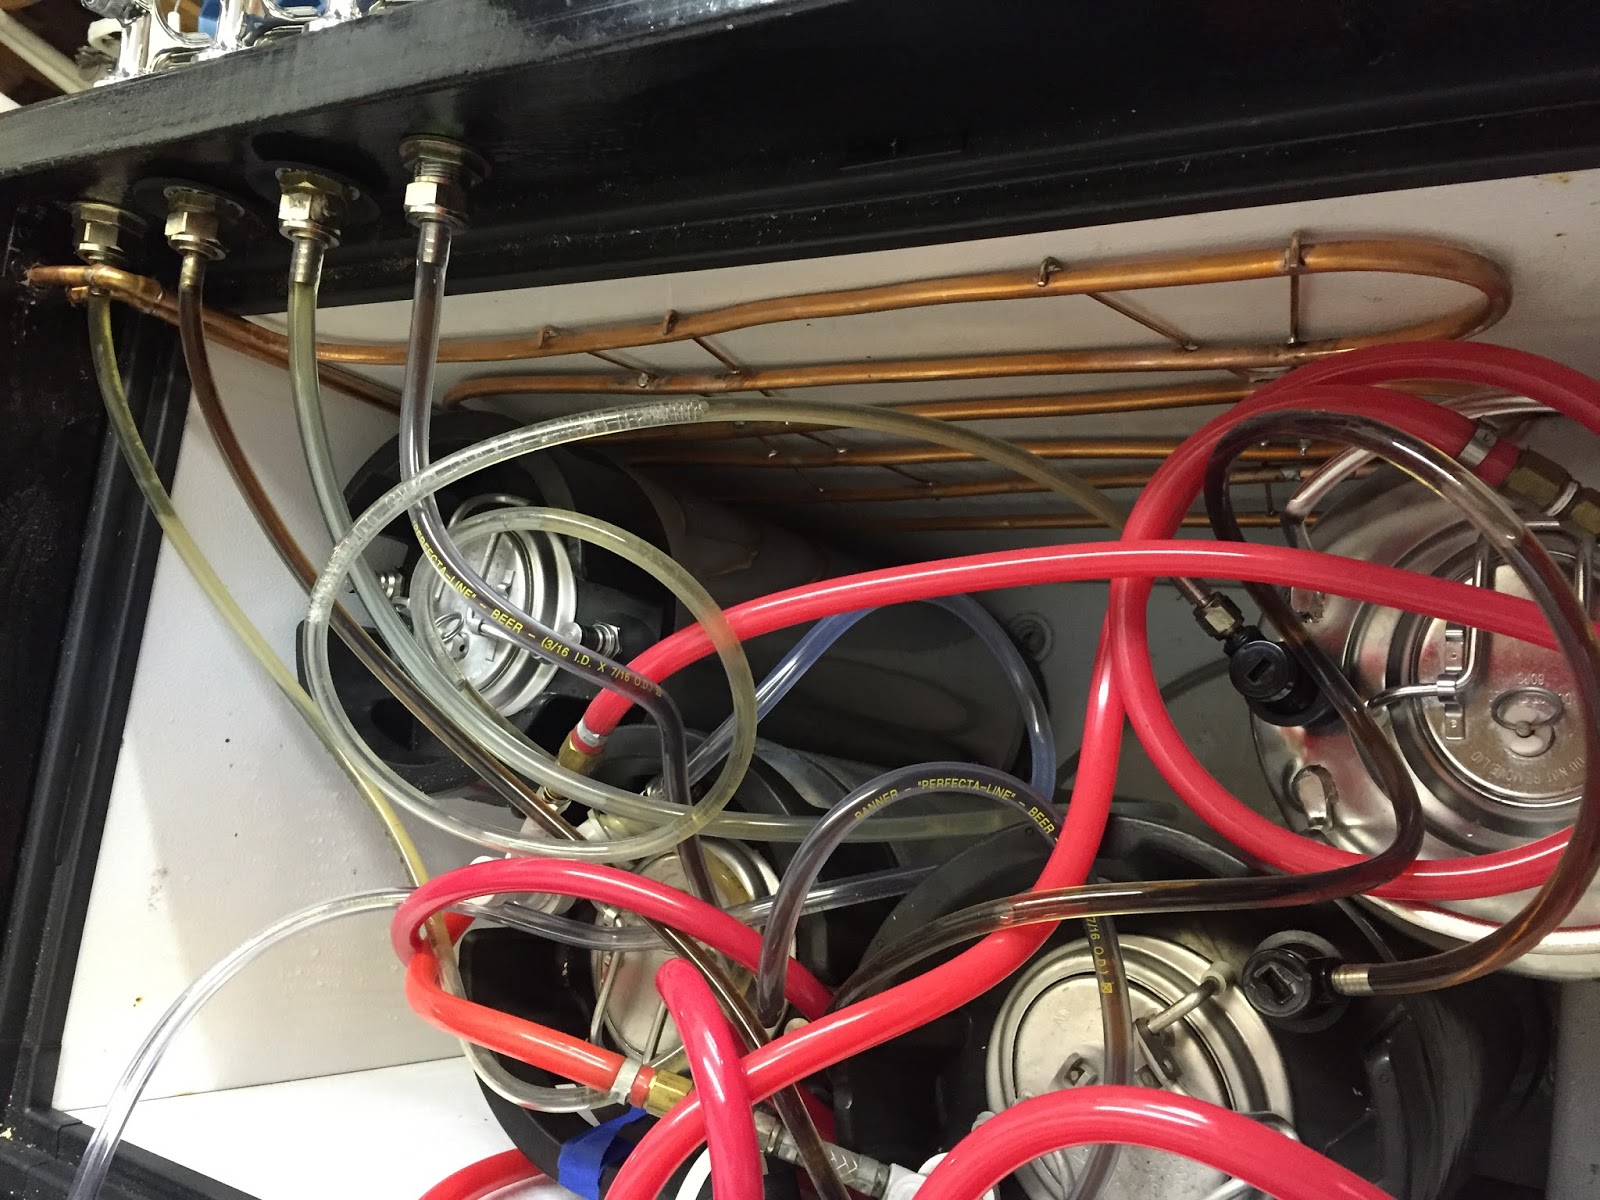
The inner business
I used the jockey box to serve up two of my homebrews at a big picnic (a change of command/unit family day), and it worked great! In fact, a friend who owns a pub brought her own two-tap jockey box (with stainless coils) to serve an IPA and a Cider, and my setup seemed to be a little less finicky - she had a lot of foam problems with the IPA. I purposefully put in extra long lines in mine in hopes of minimizing foaming issues; I did no math or scientific process, but I've got 5-footers going from the keg to the cold plate, which is 10-11 feet internally, and then 8-footers running from the plate to the taps. In my experience, longer lines help equalize the pressures and result in easier (less foamy) pours with decent head.

I hope to be covering tasting notes and recipes of these three beers, along with a modification project for my jockey box (I acquired another steel-clad cooler and am looking to make a modular, stacking setup) in upcoming posts!

Cheers!

Thursday, August 6, 2015

Another BrewGarage Project

I blew my keg of Classic American Pilsner the other day, and I began to lament the impossibility of replacing it any time soon. It has been one of the hottest (and driest) summers on record here near Seattle, and lacking a fermentation chamber or truly practical space, brewing lagers is out of the question for the foreseeable future.

Or is it?

My beer fridge is set to normal refrigerator temps (around 34°F). I could raise that up I suppose, but that would affect other things (like having cold bottled beer or the hops stored in the freezer). My keezer is set at 48-50°F, which is a little on the low side, but doable. The problem there is that putting a fermenter in there either takes up keg space (again, less beer) on the floor, or requires jury-rigging on the compressor hump (in order to have airlock clearance).

However, I began to think I might be on to something with the keezer... What if there was a way to harness the cooling temps from it without taking up space inside it? Like some kind of heat exchanger? Based on that idea, I turned to Google.

I really could not find anybody doing anything quite like what I had in mind. I was picturing a copper manifold hanging against the wall of my keezer, circulating water from cooler or garbage can by using a pond pump; the fermenter would be immersed in the water within that cooler/garbage can. This would be a very low-tech/low-cost environmental control: by keeping a larger thermal mass at lagering temperatures, the beer temperature could be held more steady and cool enough to brew a lager.

The closest thing I could find was where James Spencer (@basicbrewing) discusses using a pond pump to circulate water from an ice bath (he calls it "Low-Tech Lagering" [Basic Brewing™ Low-Tech Lagering and Decoction Mashing DVD] or "Easy Lager Chilling"). I have a Ranco ETC controller, but didn't want to mess with the ice or frozen bottles.

Since I couldn't find anybody doing it the way I envisioned, I felt it was worthy of experimenting at the very least. My total cost turned out to be less than $50US.

Parts:

  • cheap submersible pond pump (I went with the 155gal/hr model <$20US)
  • ~15' soft copper tubing, 3/8"OD
  • 2x 90° copper elbows
  • (1x copper slip connector - I spliced a 10' tubing section with a 5' section)
  • copper pipe hangers
  • 3/8"ID vinyl tubing
  • hose clamps
  • propane torch
  • water-soluble flux
  • silver (lead-free) solder
  • spring tubing bender
  • copper pipe/tubing cutter
  • hockey puck
  • fabrication mock-up/template
    When I am fabricating, I like to make mock-ups or templates on cardboard or on my work surface. I have found a few minutes building a template helps me visualize how the fabrication will unfold, allows me to troubleshoot a bit before I begin, and saves me time and materials in the long run since I invariably would screw something up without one. In this case, I took measurements inside my keezer to insure length/width fit, as well as the proper placement of the inlet/outlet tubes at the top. The dimensions of the main portion of the manifold are 24" wide x 15" tall, with all primary curves of 3" diameter.
      I straightened out my coil of copper (using the spring tubing bender). I began construction at the top of the copper manifold (bottom in the picture above), using the spring tubing bender to form my curves around my hockey puck; the hockey puck is a perfect form, since it is hard rubber and has a 3" diameter. That first 90° bend was no problem, but when I got to the first 180°, I hit my first snags...


      cheap pond pump, 3/8"OD soft copper tubing, 90° elbows, copper pipe hangers, 3/8"OD vinyl tubing, hose clamps

      Tools:


      propane torch, water-soluble flux, silver solder, spring tubing bender, copper pipe cutter, hockey puck, fabrication template


      First, (and I should have already figured this out, being a math teacher!) using a 3" form actually results in an overall diameter greater than 3"; my template was built with an OC/overall diameter of 3", but in reality I was going to gain 3/8" with each turn. This immediately messed up my project scale. Second, 3" is about the tightest inside diameter that I could bend with the spring tubing bender, and it was a HUGE pain to work the spring around the curve!

      I was able to overcome the second problem with sheer stubborn determination (and very sore fingers/hands the next day)... As far as the over-sized curves, I did some quick estimates towards the final project dimensions, did some measuring in my keezer, and initially decided to proceed and end up with a square-ish manifold. In the end, I was able to "overbend" the 180° curves to get back close to my original project dimensions; the cross tubing was not parallel or horizontal - not "pretty" - but that was fine with me... It goes inside the keezer where very few people will see it anyway! I added some rigidity to the manifold by soldering on copper pipe hangers. Then I took measurements with the manifold in place inside the keezer for proper inlet/outlet placement (getting them around the backs of the taps required careful placement).


      It ended up fitting pretty well (and looks less ugly in the keezer). 


      Heat-exchange manifold installed in keezer

      inlet/outlet detail inside keezer

      inlet/outlet detail outside keezer


      I filled a 32 gal garbage can with 5 gallons of RO water and installed the pump. Once the tubing was all hooked up, I started running the system. The H2O temperature started at 68°F, and the garage temperature was about 69-70°F. The manifold cooled immediately upon installation (I guess that's the nature of a heat exchanger!), so I'm cautiously optimistic about the system's ability to cool and maintain steady temperatures. I will collect some data, and update the blog once I have real numbers. Once I have that data, I might hook up the Ranco controller to the pump...

      This is really just a temporary (quick/cheap) solution for maintaining lager brewing temperatures. Bigger projects I am planning include temperature-controlled fermentation chambers (heating and cooling) with Arduino/RasberryPi driven temperature control.

      Thursday, March 19, 2015

      "Found" Beer?

      Can you call something "found" if you never knew it was lost in the first place? It was there all along, after all.

      I've spent a few hours over the past couple of nights screwing around in the brew garage - listening to music, organizing small bits into storage drawers, putting away stuff that I finally got around cleaning... I even recorded a video for "Home Brew Wednesday" on YouTube (https://youtu.be/TfaZyKQWk6Y).

      I'm not sure what possessed me to move some stuff at the front of the shelf where I cellar beer, but I discovered a long-lost gem at the back: one of my first Rye Pale Ales (based on the Can You Brew It Terrapin Rye). That episode aired in the middle of 2010, and I ordered the ingredients from Northern Brewer on my lunch hour at work, so that had to be in May or June of 2010.

      I don't think I can adequately express in words the feelings I had when I made this discovery... Excitement? Elation? Anticipation? Amazement? Intellectually, I do know a couple of things about that discovery however... I loved that beer, and have loved it every time I have made it; and I was going to drink it. Soon.

      I was already set for that evening as far as beer intake goes. Plus, I wanted to set myself up right for this tasting: clean palate, note taking materials, proper chilling, etc. So I placed it in the laundry room fridge, careful not to disturb the yeast at the bottom of the bottle.

      It was remarkable how brilliant the beer appeared in the bottle: I could easily read 12 point print through the beer in the bottle! The ring of sediment at the bottom was further evidence of how time had cleared this beer. I went to bed longing to try this nearly-five-year-old beer! In fact, I dreamt about the tasting session - a surreal dream where several of us sampled the beer and discussed its merits and detractors...

      The next day, there was a break in the weather, and I opted for the responsible choice and began my evening by mowing our lawn for the first time this year... That 2010 Rye Pale would have to wait. And then I had to make dinner. It was beginning to feel like I would never get to the beer!

      With my tasting notebook and a purple fountain pen in hand, I finally settled in to pour my 2010 Terrapin Rye Pale clone at about 8:30 PM. I was excited and nervous at the same time! It was a great beer in its prime, but had it stood the test of time?

      Appearance:
      As previously mentioned, I could sense its brilliant clarity in the bottle - a careful decant preserved that. It poured a brilliant copper with a tall, white, rocky head that lasted and lasted - it simply would not dissipate. I'm sure the rye malt had something to do with that, and the fact that it had a good foam stand was a good indication that there was no contamination. The carbonation was lively, with tiny bubbles rising to the head. As I drank the beer, the head did not fade, and it left a heavy lacing on the glass.

      Aroma:
      Virtually no hop aroma remained - at least given the original hop schedule (over an ounce added at 10 minutes and flameout and 1.25 oz of Amarillo as a dry hop). There was a subtle spiciness in the nose - perhaps the rye, perhaps the Goldings or Fuggles hops? I picked up something else in the aroma, something elusive... I couldn't put my finger on it. The closest I could come was slightly vanilla-toffee, just a hint.

      Taste:
      The only hop character that remained was the overall bitterness - no definable hop character. In other words, I could no longer detect any of the distinct hop flavors: no Fugg

      le, no Goldings, no Cascade, no Amarillo - no identifiable hop character. There was bitterness to balance the malt, even after 5 years. The malt had definitely moved forward as the beer aged - it used to be a hop-forward ale, with a spicy-rye malt undertone.

      That ambiguous/fleeting aroma that I had a hard time naming was also present in the flavor, which is no surprise given how much smell factors into taste. I believe that aroma/flavor is oxidation-related, because I associate it most closely with bottled British ales, like those from Fuller's or Samuel Smith. It was a bit caramel-like - sort of toffee? It was not nearly as strong as in the aroma, but it was definitely there almost as a subtext... There was a bit of oxidative twang as well, but nowhere near enough to be unpleasant.

      Mouthfeel:
      I was pleased to find that the beer had not thinned over the half decade it cellared in the garage. I do believe that all of the hop character dropping out of the beer did affect the mouthfeel, because when it was fresh, between the rye and the hops, it had a strong medium mouthfeel, falling just short of chewy. Over time, it had now settled into the medium-light mouthfeel range, and the carbonation helped contribute to that as well.

      Overall:
      Wow. My excitement at the discovery of this beer was tempered with a heavy dose of apprehension: time is the enemy. Oxygen, contamination, temperature swings - any number of variables could have crushed this beer. It is nowhere near the original beer, but it held up OK. It was enjoyable. Not as zippy as the original, it did have the pleasant oxidative character I like in bottled imported British ales. The clarity, head retention, and lacing were amazing. I kind of wish I had discovered this bottle 2-3 years ago, because I can imagine a happy medium between the original beer and the 5-year beer, and in my mind's eye, that seems amazing!

      "Lost" beer? "Found" beer? It is gone forever now. But the record of its tasting will live on...

      Wednesday, March 11, 2015

      Time for a Brew Kettle Modification?


      SS Brewtech Trub Dam
      While reading a brewing magazine recently, I saw SS Brewtech's Trub Dam. I currently have a copper tube, perforated with holes and covered with stainless steel braid; it is prone to clogging with
      My current kettle screen
      trub and protein break... at the very least, it slows WAAAAAY
      down towards the end of the draining process.

      1" copper pipe, flattened/notched 3/4" copper coupling, 90° elbow
      I sketched up a similar trub dam which used copper fittings. Some cutting, simple soldering - it was possible. I decided it was at least worth a try.

      Materials:
      1/2" x 1/2" threaded adapter
      1/2" copper pipe (1")
      1/2" copper 90° elbow
      3/4" copper coupling
      1/2" copper tube strap


      • I soldered the copper pipe section into the threaded adapter. This gets screwed directly to the threaded valve on the kettle. 
      • I had hoped to find some copper flashing for the main portion of the dam/diverter, but I could not source any locally. I got creative and cut the 3/4" copper coupling lengthwise, then bent it open and flattened it out; I notched it about 1/2" and bent that up for a soldering surface to connect to the 90° elbow.
      • I worked the 1/2" copper tube strap into a "C" shape to match the width of the flattened coupling. I filled the screw holes with solder, then soldered that 90° to the flattened coupling as the diverter on the dam. I trimmed the base to fit

      1/2" copper tube strap, soldered base/90° elbow
      base - showing uptake gap
      1/2" copper tube strap, solder-filled


      diverter/dam complete

      I'm hoping that I can get the wort going in a "whirlpool" as I chill it, and use this new diverter/dam fitting to keep the trub and hop mass out of my wort as I drain it into the carboy...

      Monday, March 2, 2015

      Brew Day: Two Dry Stouts!

      With Saint Patrick's Day a couple of short weeks away, I find myself without anything appropriate on tap! I always try to have something dark and roasty on - either a stout or a porter, o
      r both! I am not the type who thinks of darker beers as winter seasonals... I can drink a porter anytime, and a dry stout functions just fine as a "lawnmower beer" for me.
      Sláinte Mhaith - my dry stout

      I have a standby (award winning) dry stout recipe that I brew at least 2-3 times per year. It is consistent and a pleaser for any fan of the style. I call it 'Sláinte Mhaith' (SLAHN-cha wa - Irish Gaelic for 'Good Health'). It is really just the recipe from Brewing Classic Styles (http://www.amazon.com/Brewing-Classic-Styles-Winning-Recipes/dp/0937381926) by Jamil Zainasheff (@mrmalty) and John Palmer with whatever uniqueness my system/process lends:
      70% Maris Otter British Pale Malt
      20% Flaked Barley
      10% Roasted Barley
      I use WY1098 British Ale as my yeast...

      I have always loved stout - I was among the first people I knew to like Guinness (I will not admit how early). Like many brewers, I originally fell prey to the "more is better" thinking when formulating my stout recipes. When I sat down to write this blog entry, I looked back through my recipe binders and brew logs... There were TEN stout recipes (American and dry). Each was decent - I don't believe I ever made a terrible stout (I have made a few terrible beers though). But none of them was what I was looking for - thus the ten different recipes, none brewed a second time.

      Then I listened to Jamil's Dry Stout  episode on The Jamil Show (http://thebrewingnetwork.com/shows/The-Jamil-Show) - the original one, not the Brewing with Style newer one... He talked about the simplicity of classic Dry Irish Stout. I brewed that recipe, which he later included in the book referenced above: it was exactly what I had been pursuing! I have been brewing that exclusively as my dry stout recipe ever since.

      2015. The year is young, and I have been immersing myself in brewing media: Basic Brewing Radio/Video, the beer engineChop & Brew, Brewing Network... Was it time to brew a different stout? Should I put more than one stout on tap? An episode of Chop & Brew and an entry in the beer engine blog featured a Beamish-inspired dry stout - I had tried clones of Beamish in the past, but they had fallen short. This recipe, and the subsequent tasting on Chop & Brew, seemed compelling.

      I talked through my ideas with my local brewery's tasting room manager (and former student), and he mentioned he had a nitro system that was not currently in use. What?! He offered it to me on loan! That iced it - I was going to brew both, and serve them both on nitrogen!

      Brewed and ready for March 17th. No green beer here - only proper stout!

      --------------------------------------------------------------------------
      Slainte Mhaith
      --------------------------------------------------------------------------

      Category: Stout
                      Subcategory: Dry Stout
                      Recipe Type: All Grain
                       Batch Size: 5.5 gal
                    Volume Boiled: 7 gal
                  Mash Efficiency: 70 %
              Total Grain/Extract: 10.00 lbs
                       Total Hops: 2.0 oz

      Ingredients
      --------------------------------------------------------------------------
                  7 lbs Maris Otter Pale
                  1 lbs Black Roasted Barley
                  2 lbs Barley (Pregelatinized Flakes)
                    **2 oz East Kent Goldings (Whole, 5.00 %AA) boiled 60 minutes.
                 Yeast: Wyeast 1028 London Ale

      Notes
      --------------------------------------------------------------------------
      Mash @ 152°

      Vital Statistics
      --------------------------------------------------------------------------
       Original Gravity: 1.044
       Terminal Gravity: 1.009
                  Color: 27.47 SRM
             Bitterness: 41.8 IBU
      Alcohol (%volume): 4.5 %


      ** I actually shifted 10% of the hop bill to 10 minutes to match the Beamish-inspired recipe (for analoous comparison purposes)

      --------------------------------------------------------------------------
      Squeamish
      --------------------------------------------------------------------------

                         Category: Stout
                      Subcategory: Dry Stout
                      Recipe Type: All Grain
                       Batch Size: 5.5 gal
                    Volume Boiled: 6.5 gal
                  Mash Efficiency: 72 %
              Total Grain/Extract: 9.25 lbs
                       Total Hops: 1.9 oz

      Ingredients
      --------------------------------------------------------------------------
                  7 lbs Maris Otter Pale
                  1 lbs Malted Wheat
               0.75 lbs Black Roasted Barley
                0.5 lbs American Chocolate Malt
                 0.6 oz East Kent Goldings (Pellets, 5.00 %AA) boiled 60 minutes.
                 0.4 oz Perle (Whole, 8.25 %AA) boiled 60 minutes.
                 0.5 oz Hallertau (Whole, 4.50 %AA) boiled 60 minutes.
                 0.2 oz East Kent Goldings (Pellets, 5.00 %AA) boiled 10 minutes.
                 0.1 oz Perle (Whole, 8.25 %AA) boiled 10 minutes.
                0.15 oz Hallertau (Whole, 4.50 %AA) boiled 10 minutes.
                 Yeast: Wyeast 1098 British Ale

      Notes
      --------------------------------------------------------------------------
      Mash @ 152°

      Vital Statistics
      --------------------------------------------------------------------------
       Original Gravity: 1.042
       Terminal Gravity: 1.008
                  Color: 28.44 SRM
             Bitterness: 39.1 IBU
      Alcohol (%volume): 4.3 %

      Monday, February 23, 2015

      Reclamation Project (Hops and Our Garden)

      Our garden has suffered neglect for at least two years. When we first moved into this house, we were excited at the prospect of so much space: more yard, more garage, more storage... We wanted to put the garden in the sunniest part of the yard, but it had the worst soil. In order to take advantage of the sun, we had to build raised beds.

      After constructing four large (72 square feet each) beds, we soon discovered all the critters were drawn out of the woods by our new vegetation: the deer and rabbits had their way with our produce. Next came the fence!

      This was an unexpected expense, so I built it on the cheap... I ended up using "cherry" landscaping timbers instead of decent treated posts, along with 60 inch "rabbit" wire. I soon realized that the deer could easily make it over the 5 foot wire fencing, so I added two rows of single-strand aluminum electric fence wire to extend the fence height to 7 feet. The posts made it five years before the first one rotted and failed. One-by-one, a handful of other posts began leaning. The sagging fence was the final straw - it was time to fix up the eyesore that was once our garden.

      Of all the victims of our neglect, the saddest to me was my burgeoning hop collection. Two years ago, I harvested close to 10 lbs, of hops (wet). I'm pretty sure that was the last time I harvested, and did nothing in the way of maintenance since: no pruning back, no fertilizing, no supplemental watering... It's a bit depressing to think that I had gone from 10 lbs. from 13 varieties to completely ignoring them altogether.

      As I prepped to replace the fence and shape up the garden, I eyed my pots of hops. The pots are arranged alphabetically, and the first in the bunch was Cascade: a complete loss - rotted out by poor drainage (and a pot that had apparently been dumped then righted). It got better after that, and despite my laziness, the rhizomes themselves were thriving - completely filling the pots (especially the Cluster).

      I trimmed things back, saving a handful of starter rhizomes for friends before carefully repotting. This is my 2nd, and in a couple of cases 3rd, division and repotting. Recommitted to their care, I am hopeful about this years crop.

      Now I need to get back to work on the fence and reclaiming the rest of the garden!

      Tuesday, February 17, 2015

      A Return to Roots

      At least twice each year, my military buddies (and a few others) get together for a group brew day... This usually happens on Veteran's Day and President's Day weekend, when there is an extra day off and we can manage a guilt-free day away from family commitments.


      I always host. I always prepare the main dish we'll be eating during the day. I always have fun, but usually have much less time for socializing as I juggle an all-grain batch, food, and other hosting duties. I'm usually still finishing my brew day after everybody else has left. And then I'm cleaning up in the dark.


      Briess CBW Rye Malt SyrupAt my local homebrew shop (Olympic Brewing), I noticed Briess liquid rye malt extract for the first time... I'm a sucker for rye! I'll try anything with the word "rye" in it. I grabbed 3 Kg with the intention of trying it out soon...


      Another thing I really love is drafting up recipes. My recipe binder is probably at least 3 times s thick as my brewing log! So of course, after buying the rye malt syrup I took a couple of shots at rye recipes.


      Around the same time, I was making final plans for the group brew day... A light bulb went off: why not brew extract with grains? That simple decision was quite liberating actually. I seldom brew extract anymore - usually at least half of my fermentables come from a mash (partial mash); occasionally I'll brew quick batches of extract to fill keg gaps between all-grain brews (especially in the winter).


      It would be nice to have a bit more social time when everybody was over. Cutting liquor heating, mash, and sparge time out of my brew day might mean hanging out more than flitting about. My brew day would be synched with everybody else's (who mostly brew extract batches). Plus, it was like a step back in time - a return to my roots - to what got me hooked in the first place...


      I flipped back to my earliest recipes in my brew logs. It was a trip down memory lane. Although I could no longer bring to mind tasting memories of most of those early brews, I had my notes. And I remembered little associations for every single one: the ones I brewed for my wife, the bad batches, the hits and misses. The "beginner" shined through: other people's recipes (Papazian, homebrew shop, etc.), odd combinations of ingredients, weird formulations, kitchen sink brews...


      My recipe formulation has come a long way... Thanks in part to Brewing Classic Styles, I can quickly formulate a beer that falls where I want it. Experience with various ingredients - different grains and hops - has helped me with what fits best and where. My extract batches have benefited in the same way - I have a few that I stick with because they yield good results with minimal fussing: American Pale, British Bitter, and Bavarian Hefeweizen (the first two are usually made to build up a good supply of healthy yeast).


      Although I was going to make the move to simplicity for the big brew day, I did step it up from my straightforward  stand-by extract brews... I opted for a more sessionable IPA: on the low end of ABV for the style, with the bulk of the hopping as late additions. The liquid rye would provide the bulk of the fermentables, along with a little dry malt extract. I also decided to do a mini-mash of 2-row along with a bit of chocolate malt (concurrent with my main boil to preserve the time efficiency) for a bit of extra character and color.


      The brew day went great. I had more time to talk and hang out, as I had anticipated. There was much less cleanup for me. I actually had time with my family at the end of the brew day.


      Within 12 hours, my beer was off and going like gangbusters in the carboy. Time will tell how the beer actually turns out, but the process was fun, and I'm sure that the end result will be enjoyable one way or another as well.

      --------------------------------------------------------------------------
      Recipe: Rye't On
      --------------------------------------------------------------------------

      General
      --------------------------------------------------------------------------
      Category: India Pale Ale (IPA)
      Subcategory: American IPA
      Recipe Type: Extract
      Batch Size: 6 gal
      Volume Boiled: 7 gal
      Mash Efficiency: 72 %
      Total Grain/Extract: 9.11 lbs
      Total Hops: 4.6 oz
      Calories (12 fl. oz.): 185.5

      Ingredients
      --------------------------------------------------------------------------
      0.5 lbs 2-Row Brewers Malt
      0.25 lbs 2-Row Chocolate Malt
      6.6 lbs CBW® Rye Liquid (Malt Extract)
      1.76 lbs Dry Extra Light Extract
      0.6 oz Bravo (Whole, 15.50 %AA) boiled 90 minutes.
      0.6 oz Magnum (Whole, 14.50 %AA) boiled 15 minutes.
      0.7 oz Chinook (Whole, 13.00 %AA) boiled 5 minutes.
      0.25 oz Magnum (Whole, 14.50 %AA) boiled 5 minutes.
      1.3 oz Chinook (Pellets, 13.00 %AA) added to Secondary.
      0.6 oz Citra (Pellets, 12.00 %AA) added to Secondary.
      0.6 oz Magnum (Pellets, 14.50 %AA) added to Secondary.
      Yeast: Wyeast 1056 American Ale

      Notes
      --------------------------------------------------------------------------
      -Mini-mash 2-row and chocolate malt @152°

      -Dry hop 5 days

      Vital Statistics
      --------------------------------------------------------------------------
      Original Gravity: 1.056
      Terminal Gravity: 1.012
      Color: 16.13 SRM
      Bitterness: 47.7 IBU
      Alcohol (%volume): 5.8 %
      [recipe created/calculated using Beer Tools]

      Monday, September 23, 2013

      9/23/13 Happy Fall! A harvest message...

      I don't know why, but my "urge to brew" always increases during the fall. And, no, it has nothing to do with pumpkins. (Although it is always cool to field questions about or hear from folks who are brewing my pumpkin ale recipe!)

      I brewed a lot in August - 25 gallons (5x 5 gallon batches). I was particularly proud of two of those: my German Pils (turned out perfect - crystal clear, grainy and dry) and my Wit (which was a first attempt at the style). Unfortunately, I did not clean/organize a lot in August, so the brew garage is a mess... and that saps my brewing motivation.

      I have two fall projects in the works... One is a clone recipe, the other is a new process. I owe a 5-gallon batch of beer to a raffle winner, and he likes Iron Horse's Quilter's Irish Death. I have been meaning to clone that one since my era of closing down the Acme Grub Shack once a month... I have a couple of recipes in the pipe: one I made based on grain info from Iron Horse's brewer, and one from my LHBS. I'm hoping to get to these within the week, brewing half batches...

      The other project has me very excited... I have a friend who has a house in Eastern Washington - Twisp actually. He has been growing a small patch of barley each year, and wants me to help him make it into beer! So, he gave me a very small (about 1/3 lb) jar of homegrown barley, which I am now going to try to malt. Of course, the eventual goal is to grow enough (along with our own hops) to brew our own 100% homegrown beer.

      I'm working on a malting system that will be easy to scale up for when we get to that stage. From what I have read, one of the keys on the malting end is the ability to easily drain the grain periodically. It would be great to have a traditional British floor malting set-up, but that's not very practical. I'm thinking of something along the lines of Charlie Papazian's zapap system (I know, that system is actually for mashing and separating wort - but I see this as fundamentally the same process: separate he liquid from the grain)... Instead of a 5-gallon bucket, I'm looking for something wider and shallower.

      I'll worry about drying and kilning after I get the malting squared up...

      Sunday, March 31, 2013

      Easter!

      It was a beer-centric Easter. Big shock, eh?

      Our tradition over the past few years has been to host the family - whoever can come - at our house for the big meal and festivities. Lately, this has dropped down to just my in-laws...

      When it comes to food, they are probably my most critical audience (excluding the boys, whose taste preferences change seemingly week-to-week). This is not a problem (they have always liked everything I've ever made), but it is major consideration. The centerpiece of my Easter meal has become a home-cured ham.

      My recipe has evolved over the years, beginning with a recipe that I found calling for a lot of dried dark fruits, salt, and tawny port. Then I discovered beer brine (thank you Sean Paxton at www.homebrewchef.com)! Note that at no stage did I actually smoke my pork (if you really miss that smokiness - which is often an additive rather than a process - you can either smoke your ham after it is brined, or use a beer that utilizes smoked malt like rauchbier or smoked porter) but technically speaking, ham is cured leg of pork...

      This year, I forgot to buy my Dijon mustard (a critical ingredient in the "crust" of my ham). This forced another evolution this year (the recipe has stayed mostly the same the last couple of times)... I made a dry mixture of brown sugar, dry mustard powder, paprika, garlic powder, paprika, and savory instead of the usual mustard crust. And I opted for "slow and low" - 250* for 6 hours (covered for the first 5 hours).

      Wow! The meat was the most tender ever! And it has spectacular flavor...

      Here was our menu:
      • Brined Mustard-Savory Ham (home-cured) w/ Gravy
      • Scratch-made 3-Cheese Red Potatoes au Gratin
      • Mashed Mixed Root Vegetables (3 types if sweet potatoes/yams, rutabagas, turnips, parsnips...)
      • Steamed, Sautéed Basil Brussels' Sprouts and Kohlrabi

      I accompanied my flavorful meal with a 750ml of Brasserie DuPont Vielle Provision - THE Saison.

      Friday, March 29, 2013

      Hops 2013

      All the signs are pointing to spring here in the PNW!

      Last year I repotted my hops into larger pots (fear of commitment keeps mefrom planting them in the ground!). I think this was at least part of the reason for my reduced yield - in 2011, I got several pounds of hops, but not even a pound in 2012, despite adding several new varieties. I am hopeful that I might return to higher yields this year!

      When folks (homebrew shops, hop farms) start talking about selling rhizomes each year, I start checking my pots... Two weeks ago, I started to see things other than weeds starting to poke their green heads up! So, this past weekend, I weeded the pots (no small task!), and heaped done fertilizer and compost onto each family of new bines... Some of them were already close to 6" tall and looking to grab onto something!

      Tomorrow, the plan is to string my twine. Fifteen feet of fun! By now, all of them should be getting talk enough to train to the twine... A few wraps clockwise will get them headed in the right direction! Depending on just how talk they are, I might also be able to leaf them up a bit as well...


      Monday, March 25, 2013

      Stout Stew

      I received several requests for this recipe...

      I will start with the unadulterated recipe:
      2 T oil
      2 large onions, halved then sliced thin
      2 c carrots, chopped coarsely
      1/2 c celery, chopped (I like to use the inner portion, including the lovage)
      2-3 c potatoes, chopped in 1" cubes
      4-5 T flour
      1/2 t thyme
      1/2 t salt or seasoned salt
      1 t black pepper, ground
      2-3 lb beef (suitable for braising - chuck, brisket, plate, etc.), cubed
      2 c (16fl oz) Stout (I use homebrew ;-), but Guiness works great - American Stouts are more hoppy, and don't work quite as well, in my opinion)
      2 bay leaves
      1 t dried thyme (or 1 T chopped fresh)

      This can be done in the oven (325°), in a dutch oven or heavy oven-safe pot, or in the crock pot.

      1) Place the flour, thyme, salt, and pepper in a bowl or plastic bag - mix thoroughly. Toss beef cubes to coat. You can save any leftover seasoned flour to thicken the stew if you prefer it that way.
      2) Heat oil in a heavy pan. Add onions, carrots, celery, and potatoes and cook over low heat, stirring occasionally until onions clear (about 5 minutes). Remove the veggies with a slotted spoon and place in your crock pot or dutch oven.
      3) Add the beef to the sauteing pot and brown over medium-high heat. Remove the meat and add it to the crock pot or dutch oven (sprinkle with that leftover flour if you like a thicker stew).
      4) Add the stout, bay leaves, and thyme. Top off with water just to cover the contents of the pot, if necessary. Cover and cook (325° oven for 2 - 2-1/4 hours; crock pot low: 8hrs, medium: 4-6 hours). Season to taste with salt and pepper.

      A nice (and traditional Irish pub) touch if you are cooking it in the oven is to top the stew with dumplings (I use a buttermilk biscuit recipe, with added herbs) for the last 30 minutes (you can remove the lid to brown them if you like for the last few minutes).

      So, not satisfied with an already excellent recipe, I started experimenting a bit. Lately, I have been using cocoa/ancho chile rubbed brisket in this recipe, and foregoing the browning step (because the brisket is already cooked). The ancho chiles add a subtle note, and the cocoa complements the stout amazingly well! I use the following recipe from Sean Paxton (The Homewbrew Chef):
      http://www.homebrewchef.com/SmokedBeefBrisketwithChocolateAnchoRub.html
      If you can't smoke this, or don't want to smoke it, you can cook it in a slow oven very nicely as well (this actually works best for the stout stew). I cook it on a broiler pan, or other metal baking pan, at 250° until the internal temperature hits 165°. Sometimes I use a beer brine (http://www.homebrewchef.com/PorkBrineRecipe.html) before doing the rub and smoking/slow roasting... This can be cooked, then frozen for later use. (This recipe works great for pulled pork if you use a small butt and make the stout BBQ sauce!)

      Monday, October 17, 2011

      Brew Day Wrap-Up & 5 Month Update?


      Great googly moogly! May 22nd? I just can't seem to maintain any kind of momentum here.

      Today was a gloriously beautiful day in the PNW! It was a perfect brew day - we could not have planned it better. Robert arrived just after 10 AM (after doubling back to get his forgotten hops), and we started the day with some cleaning... Wouldn't it be nice if everything was clean when you got started? Yeah, right!

      We got going on the brewing fairly quickly though. Robert always gets an early lead and finishes first, because he's still doing extract/steeping partial-boil batches! Today was no different - he already hit flame-out before I even finished my single infusion mash. Plus, I am always multi-tasking here at the house: doing something for my kids, or my wife, or cooking lunch...

      He brewed up a batch of American Stout... Once his primary is done, he's going to rack it onto about 5 lbs of blackberries. I've never had a Blackberry Stout, but the LHBS owner says it's a great recipe. In a similar vein, I brewed up a batch-and-a-half of Dry Stout; I'll end up with 5 gallons of Dry Stout and about 3 gallons of Cranberry Stout. There was no collaboration in advance, and yet we still somehow ended up at fruit beers - both Stouts, no less!

      I had a substantial amount of 2nd generation Wyeast 1028 (London Ale), so I split it up for our batches and got it reactivated with a bit of starter wort before the brew session. It is always confidence-inspiring to have a good-sized pitch of active, healthy yeast that get things off and running right off the bat! This yeast really gets mixed reviews on various forums, but I've always had good luck with it. But I always use Jamil's yeast pitching rate calculator and either pitch multiple packs/vials or do a starter.

      The last 5 brewing months in review:

      June: Hops were growing like crazy - I had to weld up some additional supports to keep them from pulling my cross-wire down. No brewing. Bummer.

      July: Hops threatening to take over the garden - wife threatening to hack away at the hops (Something about having them winding their way into the corn?). Brewed up two batches of beer right at the end of the month for a leadership retreat: an Amber and an American Pale. Both were well-received, but folks were drinking very conservatively (it was late in the day and a short BBQ - everybody was playing it safe!), so despite having about 20 folks, we only put a small dent in the beer (more for later anyway!).

      August: 2 kegs of beer delivered to leadership retreat... Brewed a quick batch of extract English Pale. Began monitoring my hops very closely in anticipation of the upcoming harvest!

      September: No brewing, some cleaning around the "brewery". Began harvesting the first of my hops. The first few varieties ready were the weaker producers - a bit of a disappointing yield on my Cascades and Horizons (right around an ounce each of dried hops); looking at the others, I had to take comfort in the fact that they were faring better. The Chinooks did a little better, and I ended up with several ounces of dried hops.

      October: Finished up the hop harvest/drying... Ended up with about 1/2 pound of Fuggles. I gave up trying to separate the Glaciers and Nuggets which had decided on near-symbiosis, and I just harvested them all together; this was the big haul - over a pound of dried hops in this batch! In fact, I had so many, I had to switch from a window screen to a sliding door screen to get these dried! And I brewed today!

      Sunday, May 22, 2011

      Non-Brewing Tasks

      I wish I was brewing. But I need to recapture some fermentation space... I've got 15 gallons fermenting in the beer closet under the stairs, and another 5 going in the garage. I could easily fit a couple more carboys into either place (hybrids in the garage or ales in the house), or it would be nice to get a lager started.

      Which brings me to the less fun non-brewing tasks related to making beer. There is always something to work on. Cleaning, organizing, racking, bottling, inventorying... I have delayed racking my finished beers (5 gal of Double/Imperial Red and 5 gal of Northern English Brown) because my kegs are not cleaned and sanitized. And I have delayed brewing my first lawnmower lager, because my new beer fridge had not been cleaned since I brought it home and my keezer needed a little interior wipe-down and reorganization.

      So, instead of brewing more beer, this weekend was dedicated to some of those tasks that would enable me to brew more beer. Six 5 gallon kegs (and one more that is used for my kids' root beer). All in various stages of uncleanliness, ranging from absolutely filthy with god-knows-what dregs in the bottom to empty and rinsed but not really clean. I broke out the OxyClean, filled up a 40 qt cooler, and got to work. A couple of hours of elbow grease, and they were as shiny and clean as they were going to get!


      Given the state of the kegs, I knew the beer lines were going to be a total loss, so I cut all the tubing off and threw it away. I scrubbed, then boiled all of the fittings (the beer-out connectors, the cobra taps) to make sure they were clean. Then I refitted them all with fresh new beer line in anticipation of new beer!

      I also figured it was about time to press my new beer fridge into service... I got it a few weeks ago, and it is still not in use. I did clean out the freezer part right away, but then abandoned the project for other priorities. My wife would really like my hops out of the house freezer to make room for more food and she would really prefer if my yeast was stored someplace else as well. And it might actually be more my own fault when it comes to the yeast - I am really picky about what gets put into that refrigerator: nothing to smelly, nothing too hot, etc. (gotta take care of my yeast!).


      My wife pitched in and helped me on the fridge cleaning (see what I mean?). The inside looks super, but there's not much we could do about the neglect on the outside. Maybe it is destined for a custom paint job? It's all plugged in and cooling down in anticipation of the goods!