Or is it?
My beer fridge is set to normal refrigerator temps (around 34°F). I could raise that up I suppose, but that would affect other things (like having cold bottled beer or the hops stored in the freezer). My keezer is set at 48-50°F, which is a little on the low side, but doable. The problem there is that putting a fermenter in there either takes up keg space (again, less beer) on the floor, or requires jury-rigging on the compressor hump (in order to have airlock clearance).
However, I began to think I might be on to something with the keezer... What if there was a way to harness the cooling temps from it without taking up space inside it? Like some kind of heat exchanger? Based on that idea, I turned to Google.
I really could not find anybody doing anything quite like what I had in mind. I was picturing a copper manifold hanging against the wall of my keezer, circulating water from cooler or garbage can by using a pond pump; the fermenter would be immersed in the water within that cooler/garbage can. This would be a very low-tech/low-cost environmental control: by keeping a larger thermal mass at lagering temperatures, the beer temperature could be held more steady and cool enough to brew a lager.
The closest thing I could find was where James Spencer (@basicbrewing) discusses using a pond pump to circulate water from an ice bath (he calls it "Low-Tech Lagering" [Basic Brewing™ Low-Tech Lagering and Decoction Mashing DVD] or "Easy Lager Chilling"). I have a Ranco ETC controller, but didn't want to mess with the ice or frozen bottles.
Since I couldn't find anybody doing it the way I envisioned, I felt it was worthy of experimenting at the very least. My total cost turned out to be less than $50US.
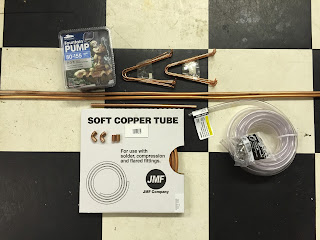
Parts:
- cheap submersible pond pump (I went with the 155gal/hr model <$20US)
- ~15' soft copper tubing, 3/8"OD
- 2x 90° copper elbows
- (1x copper slip connector - I spliced a 10' tubing section with a 5' section)
- copper pipe hangers
- 3/8"ID vinyl tubing
- hose clamps
- propane torch
- water-soluble flux
- silver (lead-free) solder
- spring tubing bender
- copper pipe/tubing cutter
- hockey puck
- fabrication mock-up/template
Tools:
First, (and I should have already figured this out, being a math teacher!) using a 3" form actually results in an overall diameter greater than 3"; my template was built with an OC/overall diameter of 3", but in reality I was going to gain 3/8" with each turn. This immediately messed up my project scale. Second, 3" is about the tightest inside diameter that I could bend with the spring tubing bender, and it was a HUGE pain to work the spring around the curve!
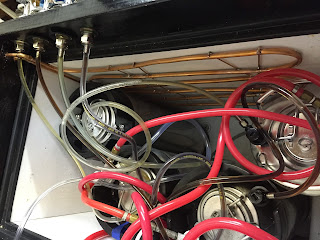
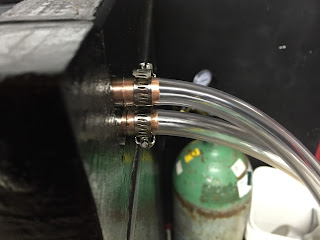
I was able to overcome the second problem with sheer stubborn determination (and very sore fingers/hands the next day)... As far as the over-sized curves, I did some quick estimates towards the final project dimensions, did some measuring in my keezer, and initially decided to proceed and end up with a square-ish manifold. In the end, I was able to "overbend" the 180° curves to get back close to my original project dimensions; the cross tubing was not parallel or horizontal - not "pretty" - but that was fine with me... It goes inside the keezer where very few people will see it anyway! I added some rigidity to the manifold by soldering on copper pipe hangers. Then I took measurements with the manifold in place inside the keezer for proper inlet/outlet placement (getting them around the backs of the taps required careful placement).
It ended up fitting pretty well (and looks less ugly in the keezer).
I filled a 32 gal garbage can with 5 gallons of RO water and installed the pump. Once the tubing was all hooked up, I started running the system. The H2O temperature started at 68°F, and the garage temperature was about 69-70°F. The manifold cooled immediately upon installation (I guess that's the nature of a heat exchanger!), so I'm cautiously optimistic about the system's ability to cool and maintain steady temperatures. I will collect some data, and update the blog once I have real numbers. Once I have that data, I might hook up the Ranco controller to the pump...
This is really just a temporary (quick/cheap) solution for maintaining lager brewing temperatures. Bigger projects I am planning include temperature-controlled fermentation chambers (heating and cooling) with Arduino/RasberryPi driven temperature control.


