Showing posts with label brewing techniques. Show all posts

Wednesday, July 8, 2020

Wild Yeast Ideas

A few months ago, a friend of mine posted about trying to capture some "wild" (actually local, not necessarily wild) yeast to use in his bread making endeavors. I pointed him towards The Mad Fermentationist, hoping I might help him be successful. Of course, revisiting Michael Tonsmeire's work sent me down the rabbit hole... Where I discovered Sui Generis Brewing and http://suigenerisbrewing.com, which I also shared with my friend.

For years, I have dreamed of cultivating yeast from my own yard in order to brew beer. Between hearing about relatively low success rates and the amount of time I actually have been spending on brewing the last few years, the idea has gotten shelved almost as soon as my mind has wandered to the topic.

Although I had not yet recommitted myself to brewing, watching Bryan's videos at Sui Generis got me thinking about local yeast again... My new "small batch" mindset seems perfect for a little bit of yeast experimentation!

Several types of berries are currently ripening around my yard, and I have always considered these when thinking of trying to collect local yeast:
  • salmon berry (Rubus spectabilis - usually the first to ripen each year; very tart, even when ripe; rare to find fully ripened [red] berries - they are a favorite of the robins!)
  • thimbleberry (Rubus parviflorus - usually ripen following the salmon berry; red raspberry-like fruit; sweeter than salmon berry, but not super sweet)
  • trailing blackberry (Rubus ursinus - usually ripens in August, but is ripening early this year; the only blackberry truly native to my area; sweet and highly sought after, especially by wild berry snobs)
  • red huckleberry (Vaccinium parvifolium - usually ripens mid-summer; tart)
In late summer and early fall, I will also have access to:
  • Himalayan blackberry (Rubus armeniacus - ripens late summer; large, juicy berries - extremely sweet; considered a noxious weed, and ill-favored by wild berry snobs)
  • evergreen blackberry (Rubus laciniatus - ripens late summer; often intermingled with Himalayan blackberry; larger, seedy berries - tart; considered a noxious weed and not picked by anybody)
  • evergreen huckleberry (Vaccinium ovatum - ripens late summer/early fall; small black berries - sweet)
  • salal (Gaultheria shallon - ripens in late summer/early fall; mealy berries - not much flavor; I have seen robins get "drunk" from eating extremely ripe salal berries in the fall!)
  • Oregon grape (Mahonia nervosa - ripens late summer/early fall; small, purple berries - tart)
Tonight, I decided to get the ball rolling. I boiled up a batch of weak starter (1.020 w/ ~8 BU; 100g DME/200ml water). My father-in-law gave me his old 22-quart pressure cooker (in all its yellow enamel splendor, complete with the 1980 sales receipt!), so I made plenty of starter wort and canned it in pint mason jars.

Saturday, July 4, 2020

Brew Year's Resolution - in July (There's a Pattern)

Some people do New Year's Resolutions. Apparently, I do summer resolutions!

Here it is July again, and I find myself gravitating back to homebrewing. Again. I only brewed 5 beers in 2019, and 4 of them were brewed in the summer. I would like to say that this will change for the remainder of 2020 (which has obviously been a doozie!) and into 2021, but I say that every year...

I like planning - developing recipes. I like brewing. I certainly like drinking the results. But like so many other brewers, I hate cleaning! The setup and time for an all-grain brew day is a bit of a drag as well. I suppose that there are ways to make setup more efficient, which might shave some time off of that step. An extract or extract with steeping grains batch can reduce the brew day a great deal. There are no real shortcuts for cleaning, however.

This summer, I find myself analyzing brewing a bit differently. Along with the simplified analysis of what I like and don't like about brewing in general, I decided to think about what I like about drinking  beer. Above all else, I love the refreshing variety of flavor and style options. My wife is always asking me why I need so much beer; the answer is choice. I like to have choices!

Some days I want something light and refreshing - a craft lager or pilsner hits the spot (and because of hockey, I also always have some locker room beer like Rainier or PBR). Other days, I crave something hoppy - an IPA, pale, or session pale are there for me on those days. When I long for something dark and roasty - a porter or stout fits the bill. Besides simply matching the hankering in the moment, I also like to match the beer to the food I make.

Brewing that much variety in 5-gallon (or larger) batches is an undertaking. I do have a 4-tap keezer, but brewing and keeping 20 gallons of beer is kind of a big deal. When I used to brew with friends, it was easier; one year, a friend and I brewed over 300 gallons! Nowadays, however, it seems like I barely brew 20 gallons a year! Clearly, a different approach is in order...

In years past, I have mashed and brewed a bigger batch - to the tune of 10-12 gallons - and split it into two smaller batches. That worked well enough: more beer for not much more time on a brew day (running two burners for the boils). I have tried parti gyle batches, were I got a bigger beer and a smaller beer; I have made different beers from the same wort by varying hop charges and yeasts; and I have brewed very different styles from the same base wort by utilizing steeping grains. Each of these double batches got me two kegs. I'm not sure that any of these methods will get me brewing more often though.

Even if I were to go the double batch route, and fill all four of my taps, that might be 2 or 3 brew days, which is reasonable. Although four choices is technically quite a bit of variety - I could easily cover my bases with a lager, something hoppy, something darker, etc. - that's 5 gallons each; roughly 36 pints each keg. The novelty of those specific varieties often wears off before the keg is blown.

When I first begain brewing, doing extract batches on the stovetop, I often brewed smaller batches. Not only was it easier to manage, I also got to try my hand a lot of different styles! Back then, bottling 2-3 gallons of beer into some combination of about 24 bottles, 12 ounce and 22 ounce, was a lot less daunting task than bottling a full 5-gallon batch as well. After watching James Spencer brew up a one gallon batch on Basic Brewing Video, I even did a bunch of those batches, which yielded about a six pack of finished beer (that was a lot of work for six beers - I would recommend doing a 2-3 gallon batch over this method, unless you were conducting experiments).

These days, I have four 2.5-gallon kegs, which I have used for the occasional 1/2 batch (or when I brew something like a mild for a yeast starter). When I eyed those smaller kegs the other day, it got the gears turning... The smaller volume might get me over the "I'm kind of tired of this" hurdle. The smaller size also means that I can potentially fit more into my keezer - if I stack them; if I add some new taps, I could potentially double my choices (withiout having to drink 5 gallons of the same beer!)!

The prices have come down quite a bit on the smaller kegs (at least since I first bought mine about 5 years ago). I'm thinking it is probably worth investing in few more 2.5-gallon kegs. I already have quite a few 3-gallon carboys - more than enough to get a handful of beers going. Scaling recipes is a snap.

All of this has me a little bit excited - more excited than I have been about brewing for a while! My plan for reinvigorating my brewing is to go small! It is undoubtedly too early, given that I have not even begun brewing aything yet, but I am dubbing this the "brew-a-week" plan...

Tuesday, February 17, 2015

A Return to Roots

At least twice each year, my military buddies (and a few others) get together for a group brew day... This usually happens on Veteran's Day and President's Day weekend, when there is an extra day off and we can manage a guilt-free day away from family commitments.


I always host. I always prepare the main dish we'll be eating during the day. I always have fun, but usually have much less time for socializing as I juggle an all-grain batch, food, and other hosting duties. I'm usually still finishing my brew day after everybody else has left. And then I'm cleaning up in the dark.
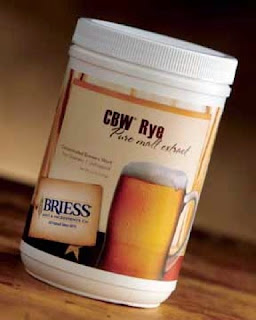

Briess CBW Rye Malt SyrupAt my local homebrew shop (Olympic Brewing), I noticed Briess liquid rye malt extract for the first time... I'm a sucker for rye! I'll try anything with the word "rye" in it. I grabbed 3 Kg with the intention of trying it out soon...


Another thing I really love is drafting up recipes. My recipe binder is probably at least 3 times s thick as my brewing log! So of course, after buying the rye malt syrup I took a couple of shots at rye recipes.


Around the same time, I was making final plans for the group brew day... A light bulb went off: why not brew extract with grains? That simple decision was quite liberating actually. I seldom brew extract anymore - usually at least half of my fermentables come from a mash (partial mash); occasionally I'll brew quick batches of extract to fill keg gaps between all-grain brews (especially in the winter).


It would be nice to have a bit more social time when everybody was over. Cutting liquor heating, mash, and sparge time out of my brew day might mean hanging out more than flitting about. My brew day would be synched with everybody else's (who mostly brew extract batches). Plus, it was like a step back in time - a return to my roots - to what got me hooked in the first place...


I flipped back to my earliest recipes in my brew logs. It was a trip down memory lane. Although I could no longer bring to mind tasting memories of most of those early brews, I had my notes. And I remembered little associations for every single one: the ones I brewed for my wife, the bad batches, the hits and misses. The "beginner" shined through: other people's recipes (Papazian, homebrew shop, etc.), odd combinations of ingredients, weird formulations, kitchen sink brews...


My recipe formulation has come a long way... Thanks in part to Brewing Classic Styles, I can quickly formulate a beer that falls where I want it. Experience with various ingredients - different grains and hops - has helped me with what fits best and where. My extract batches have benefited in the same way - I have a few that I stick with because they yield good results with minimal fussing: American Pale, British Bitter, and Bavarian Hefeweizen (the first two are usually made to build up a good supply of healthy yeast).


Although I was going to make the move to simplicity for the big brew day, I did step it up from my straightforward  stand-by extract brews... I opted for a more sessionable IPA: on the low end of ABV for the style, with the bulk of the hopping as late additions. The liquid rye would provide the bulk of the fermentables, along with a little dry malt extract. I also decided to do a mini-mash of 2-row along with a bit of chocolate malt (concurrent with my main boil to preserve the time efficiency) for a bit of extra character and color.


The brew day went great. I had more time to talk and hang out, as I had anticipated. There was much less cleanup for me. I actually had time with my family at the end of the brew day.


Within 12 hours, my beer was off and going like gangbusters in the carboy. Time will tell how the beer actually turns out, but the process was fun, and I'm sure that the end result will be enjoyable one way or another as well.

--------------------------------------------------------------------------
Recipe: Rye't On
--------------------------------------------------------------------------

General
--------------------------------------------------------------------------
Category: India Pale Ale (IPA)
Subcategory: American IPA
Recipe Type: Extract
Batch Size: 6 gal
Volume Boiled: 7 gal
Mash Efficiency: 72 %
Total Grain/Extract: 9.11 lbs
Total Hops: 4.6 oz
Calories (12 fl. oz.): 185.5

Ingredients
--------------------------------------------------------------------------
0.5 lbs 2-Row Brewers Malt
0.25 lbs 2-Row Chocolate Malt
6.6 lbs CBW® Rye Liquid (Malt Extract)
1.76 lbs Dry Extra Light Extract
0.6 oz Bravo (Whole, 15.50 %AA) boiled 90 minutes.
0.6 oz Magnum (Whole, 14.50 %AA) boiled 15 minutes.
0.7 oz Chinook (Whole, 13.00 %AA) boiled 5 minutes.
0.25 oz Magnum (Whole, 14.50 %AA) boiled 5 minutes.
1.3 oz Chinook (Pellets, 13.00 %AA) added to Secondary.
0.6 oz Citra (Pellets, 12.00 %AA) added to Secondary.
0.6 oz Magnum (Pellets, 14.50 %AA) added to Secondary.
Yeast: Wyeast 1056 American Ale

Notes
--------------------------------------------------------------------------
-Mini-mash 2-row and chocolate malt @152°

-Dry hop 5 days

Vital Statistics
--------------------------------------------------------------------------
Original Gravity: 1.056
Terminal Gravity: 1.012
Color: 16.13 SRM
Bitterness: 47.7 IBU
Alcohol (%volume): 5.8 %
[recipe created/calculated using Beer Tools]

Saturday, May 7, 2011

Birthday Party Dry Hop


My Double/Imperial Red Ale (Bruise Bros) finished out right around the same time as my Redwings: good on the beer, bad on the'Wings. Time to dry hop it!

Weekends are always busy, and this was no exception. Mother's Day tomorrow, and today we did the family celebration of Brandon's birthday a week early, since I won't be around next Saturday on his real birthday. I had a bunch of stuff to do in the morning to get ready for company to come over, so I was just preparing my hops when folks started showing up...

My dad, who used to work at the Rainier Brewery back in its heyday (and whose grandfather was the business manager of the Horluck's plant for Sick's Brewing from the late-30s through the 60s), always takes an interest in my brewing despite the fact that he no longer drinks. As I weighed out the hops, sanitized marbles (to weigh them down), and shoved them into a hop bag, he shared how much he hated the smell of hops.

What? Are you crazy? Hate the smell of hops? He explained that he liked the smell as they were added to the wort, but he had negative associations with the smell of plain dried hops. It seems that when he first went to work at Rainier (he was 14 years old), one of his jobs was to move hop bales from cold storage to the brewhouse for the brewers.

Just like today, the hops were bundled into 100 or 200 pound sewn burlap bales; at 14 my dad probably did not weigh much more than 90-100 pounds since he weighed about 120 when he enlisted in the Marines at the age of 19. At any rate, he had to wrestle the bales out of cold storage, transport them using a hand-truck through the brewery up an elevator into the brewhouse. It was exhausting work, and he could not get rid of the smell. I guess I can see where his dislike comes from... I still like it though.

Monday, May 2, 2011

Finally! (Parti Gyle Complete)

In true Medius Nox Noctis form, I finished my parti gyle brew in the wee hours of the morning...

First of all, it is a crazy brewer who tries to brew multiple all-grain batches in one day. The brewer who thinks they can do three should not roam the streets of his free will. I will never do that again (even if my wife would let me)!

Besides time, the biggest challenge I faced with my parti gyle brew day involved brewing software. I do own BeerTools Pro, but I am usually too lazy to use it; maybe there is parti gyle formulation capability built into the software, but I wouldn't know. I primarily use the BeerTools.com website for my recipe formulation. It is not as robust or flexible as the BeerTools Pro standalone software, but it is quick and gets me in the ballpark for all my recipes; plus I am a "Gold" member, so I can store up to 256 recipes online.

The online recipe calculator has no parti gyle flexibility - or much in the way of sparge adjustments at all. It simply takes your grain bill and your recipe volumes and calculates out your gravities. This works great for the average batch or fly-sparged recipe. But for no-sparge or parti gyle? Not so much.

At any rate, I ended up pretty close to the predictions on the first batch (the Old Ale), which came in just over 1.100 OG with 5.5 gallons into the carboy. For the second beer, a Northern English Brown, I could not figure out how to make the adjustments in the interface to calculate the second runnings separately... I ended up just plugging in a completely new recipe, preserving the grain bill ratios and hop additions, but scaling it down to the actual gravity I pulled into the kettle.

I used some interesting yeast strains (Wyeast Old Ale Blend for the Old Ale, and Wyeast West Yorkshire Ale for the Northern English Brown) this time around. The Old Ale, dubbed 'The Reaper', will actually get racked into a secondary to let the Brettanomyces do its work; it will eventually go into bottles as part of my gift beer for the Holidays at the end of 2011. The Northern English Brown ('The Creeper') will be ready much sooner, and I can't wait to pull some pints off draft in a few weeks!

Thursday, April 28, 2011

More Yeast!


Like some evil genius in a classic horror movie, I like to grow my army of minions! My minions happen to be microscopic, but they still are powerful - they make my beer for me!

I posted previously about getting a late start on my brewing resolutions... I want to make sure I am brewing regularly, so that my process becomes smooth again. So this weekend - 3 batches! Today I started my yeast for a California Common, an Old Ale, and a Northern English Brown (these last two are going to come from the same grain bill - see my earlier post regarding parti gyle brewing).

I have never brewed a California Common, and I have never worked with the two yeasts I will be using on my Old Ale and my Northern English Brown. I have made two Old Ales in years past; the first one I spiced as a holiday beer, and it did not turn out very well (I under-pitched the first 5 gallons, which were so estery it was only good for mulled ale; the second five gallons were OK). I have brewed both Southern and Northern English Brown in the past, both from kits; these were OK as well, but I am striving for something better.

For my starters, I use the basic metric formula as spelled out in John Palmer's How to Brew: 100 grams of DME for each liter of wort (or 125 g of LME). For "normal" gravity ales (1.050 or less) I tend to just do 1L starters, and for higher gravities I'll do 2 or 3L. If I am brewing a lager or brewing for competition, I use Jamil's pitching rate calculator (www.mrmalty.com, also available on the Wyeast website) to be more precise.

I built myself a simple stir plate from plans available on the internet, and generally follow all of the sanitation instructions published by established homebrewing authors. I use 1 gallon jugs, which I discovered have a slightly convex bottom, making them useless on the stir plate. Eventually, I'll get myself some large Erlenmeyer flasks, but this is not preventing me from making decent yeast starters.

Wednesday, April 27, 2011

Planning My First Parti Gyle!


Without getting too far into the details of the brewing process, parti gyle brewing is a traditional (nearly, extinct, commercially at least) technique. Most modern brewers make one beer from one mash/grain bill. In parti gyle brewing, multiple beers are made from one mash/grain bill. With current brewing techniques, the first runnings (first drain of sugary water from the grain) are combined with the subsequent sparge (rinsing of the remaining sugars) to make one batch of wort, which will become one batch of beer when the yeast are done doing their thing...


With the parti gyle technique (originating in Scotland), the first runnings are used to make a bigger (stronger/higher gravity) beer, and the subsequent sparge(s) is used to make one or more smaller (less strong/lower gravity) beers. In its simplest form, the first runnings compose the wort for one distinct beer, and each subsequent sparge creates another distinct beer. This is evident in monastic and farm brewing: the first runnings went to create beer for the abbot or landowner; the second runnings were for the monks or guests at the farm; and the later runnings went to create table beer for the laymen & pilgrims or the farmhands.


Another parti gyle technique involves blending of the various runnings, with the strongest of the line of beers being 100% (or near 100%) of the first runnings, and the lowest gravity beer being mostly last runnings. One commercial brewery that still uses this particular technique is Fuller Smith & Turner (aka Fuller's) in the UK. Fuller's Golden Pride is an example of the strong end of their line, with ESB and London Pride somewhere in the middle, and Chiswick Bitter at the bottom of the beer-strength continuum. The same grain bill is used to brew them all, but each is blended at a different rate from the runnings off of the mash.


For those brewers that brew two distinctive, individual (not blended) parti gyle beers, there is further variation.

The brewer can choose a runoff volume ratio to determine how much wort is created for each batch. Common ratios include 1/3 first runnings to 2/3 second ruings, or 50-50. In the 1/3 to 2/3 ratio, the first third yields a stronger, richer wort in smaller volume which means less finished beer quantity; but it is higher in alcoholic strength and arguably the stronger flavor profile yielded by the combination of grains selected for the mash; the final 2/3 result in twice as much finished beer, but at half the strength and possibly less-pronounced or more subtle grain flavor profiles. The 50-50 method yields equal volumes, with less alcohol content and flavor differentials; the brewer still ends up with one stronger beer, both in alcohol and flavor characteristics, but simple chemistry and physics leads to a narrower extreme on both ends.


My first attempt will be a 50-50, just for ease of process. I will be making an Old Ale with the first runnings and a Northern English Brown with the second runnings (as opposed to a stronger Old Ale or Barleywine with the 1st runnings and a mild or or ordinary bitter with the 2nd runnings if I did the 1/3 to 2/3 method). Old Ale is a big English style ale, characterized by an elevated level of sweetness and alcohol. Originally, these beers were aged significantly before being drunk, but these days most commercial examples are either not aged, or a blend of aged and newer beer. If you can get your hands on them, good commercial examples include Theakston Old Peculier or Greene King lde Suffolk. Northern English Brown is a malt-balanced ale, with low hop bitterness and minimal hop aroma. Commercial examples include Newcastle Brown Ale and Samuel Smith's Nut Brown Ale (I am hoping for more of the Samuel Smith's version).


I have two special, limited edition Wyeast yeasts for these beers. The Old Ale Blend (WY9097) is a blend of alcohol-tolerant, dry English ale yeast with a bit of Brettanomyces (a different, non-beer yeast); the ale yeast will do a good job fermenting down the beer with a nice English character for starters, then the Brettanomyces will take over, fermenting some of the sugars that were unfermentable by the ale yeast, adding some rustic aged characteristics to the finished beer. For the Northern English Brown, I am using West Yorkshire Ale (WY1469), which should help emphasize plenty of the malt flavor and character, and finish dry and balanced with some nutty/fruity esters. We'll see.